Upon using photoshop we have been using different sorts of tools such as, smudge, paintbrush, Marquee tool,
Layers.pallet, History pallet.
Here are some examples of shortcuts discovered today:
Alt+Del = Fill foreground colour.
A = Cursor.
E = Eraser
Brush tool used different sized brushes with 75% strength
Smudge tool with higher strength includes more of a smudge effect.
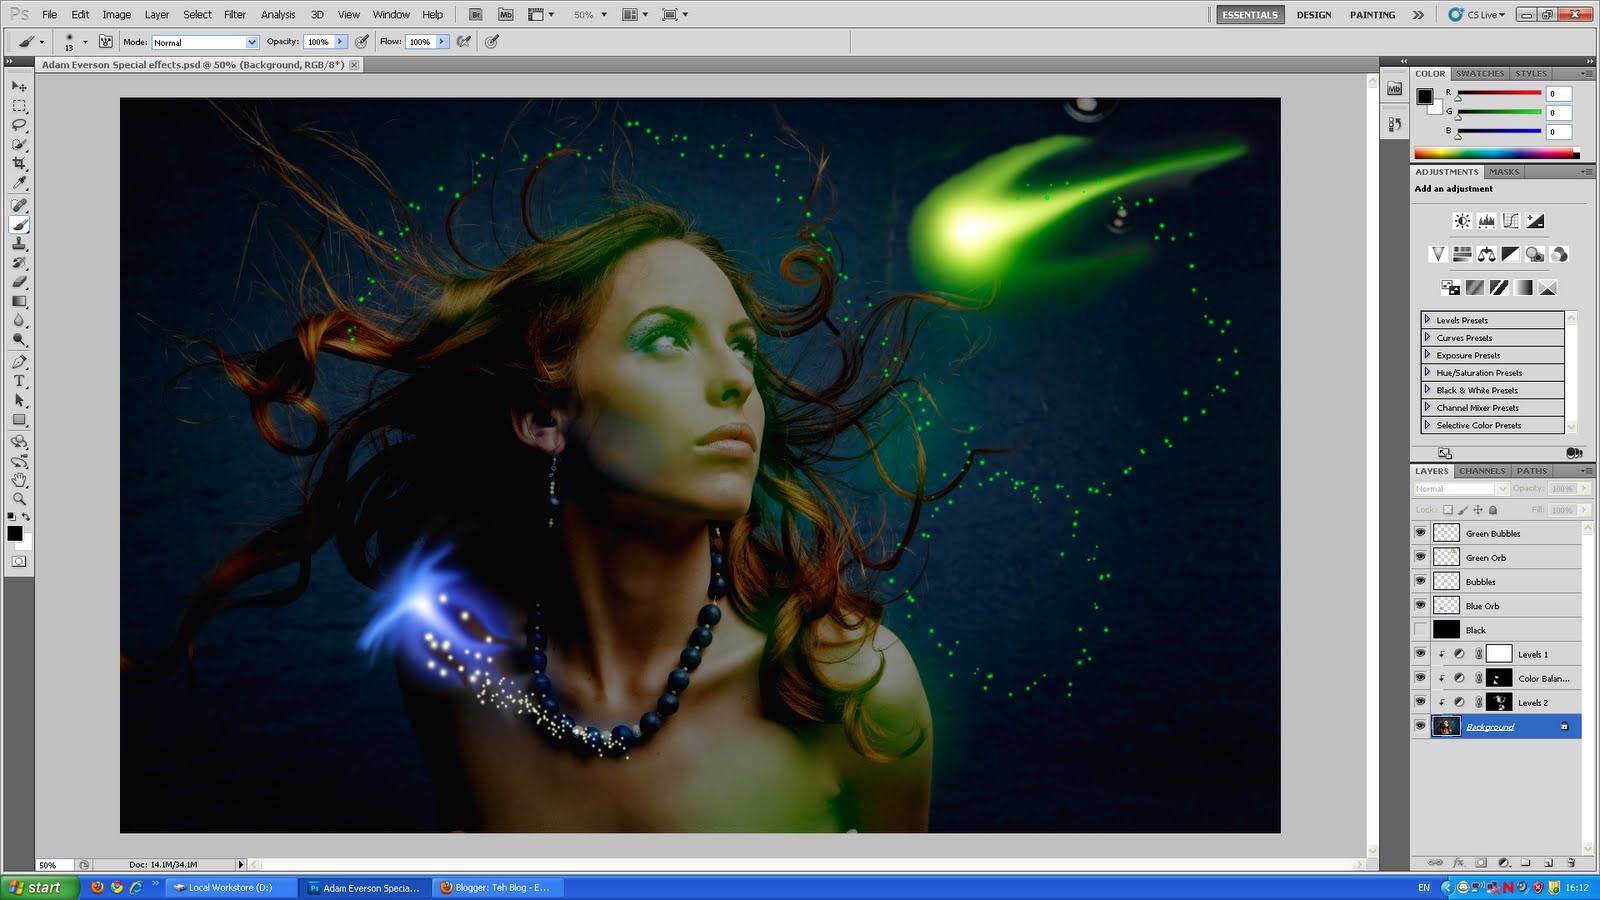
This here is the finished result of the blue orb we have been making.

We decided to stretch the front and the sides of the orb to give it fins for more effect, we used the smudge command to do this again. Next we have decided to add more effect to the blue orb so we added more effects with the scatter brush We customized our brushes with the shape dynamics and the scattering effects, i increased the scatter and the jitter scales. I also added the fade effect. Here is the finished result.

After this we have decided to make a green orb the exact same way. We got rid of the black background to sort where to put the orbs. We then decided to darken the image and show the effects of the orbs by making the light bounce off her face. Shades of a lighter green and lighter blue have been used here. This is the final result.
Half way through doing this my computer crashed but i managed to recover the data in the end and catch up.
No comments:
Post a Comment